Title here
Summary here
This is the point in the course where you get your hands busy. You are not expected to read through this module. This module has been specially designed so that you can practice as you learn.
Pro Tip: The best way to learn API documentation is to write one.
In this module, you will explore different API documentation tools and provide a comprehensive overview of their use cases. We’ll look into samples of how to use popular API documentation tools to generate comprehensive, accurate, and visually appealing documentation.
Creating a strong impression for your API starts with the Docs.
An API documentation is like a school lab handbook, where the student relies on each step to successfully experiment. The same goes for developers integrating your API into their projects. Your API documentation has to make it as easy as possible for them to navigate and interact with your API.
API documentation is as important to you as it is to the developer.
One popular misconception is that API documentation is just for developers. API documentation explains your API’s capabilities and functionalities and also serves as a knowledge base or reference for your team.
API documentation makes it easier for maintenance to be carried out after updates, enhances API security, and eases onboarding for the new employee who has to work with that API. Your internal team benefits from API documentation as much as a developer integrating it does.
Nobody said it was going to be easy
Creating and maintaining detailed, accurate, and user-friendly API documentation can be work-intensive and challenging. However, this process can be easier and more accurate using API documentation tools. These tools help in creating, maintaining, and updating your documentation efficiently, ensuring accuracy and usability.
There are two types of API documentation tools: Interactive tools and Non-interactive tools.
From the name “interactive”, it simply means that you can perform certain actions using the API directly on the platform. These interactions range from enabling users to test API endpoints and see responses in real-time to more advanced interactions like customizing API requests and testing use cases from a playground.
Common Features of Interactive Tools
Pros of Interactive Tools
Interactive API documentation tools give more than just a description of the API. They enhance the user experience by providing a place where the users can interact and test the API before integrating it into their project.
Examples of Interactive Tools
Several API documentation platforms provide an interactive playground for users to test API endpoints and get real-time responses.
They include:
Let’s test out some of these platforms and see how they are interactive
In this hands-on section, we will use the Petstore API as our example and demonstrate how to document it using Swagger (OpenAPI), and Mintlify
In this section, we will walk through how to use Swagger to interact and test API and see responses in real-time.
Step-by-Step Guide
a. To simply test the endpoints or play around with the API parameters, you can click on
**Live Demo**

We are looking beyond testing endpoints, so let’s create our API document and interact with it on Swagger.
b. Sign up to Swagger UI, and you will be sent to the **Homepage**, Click on **Create API**
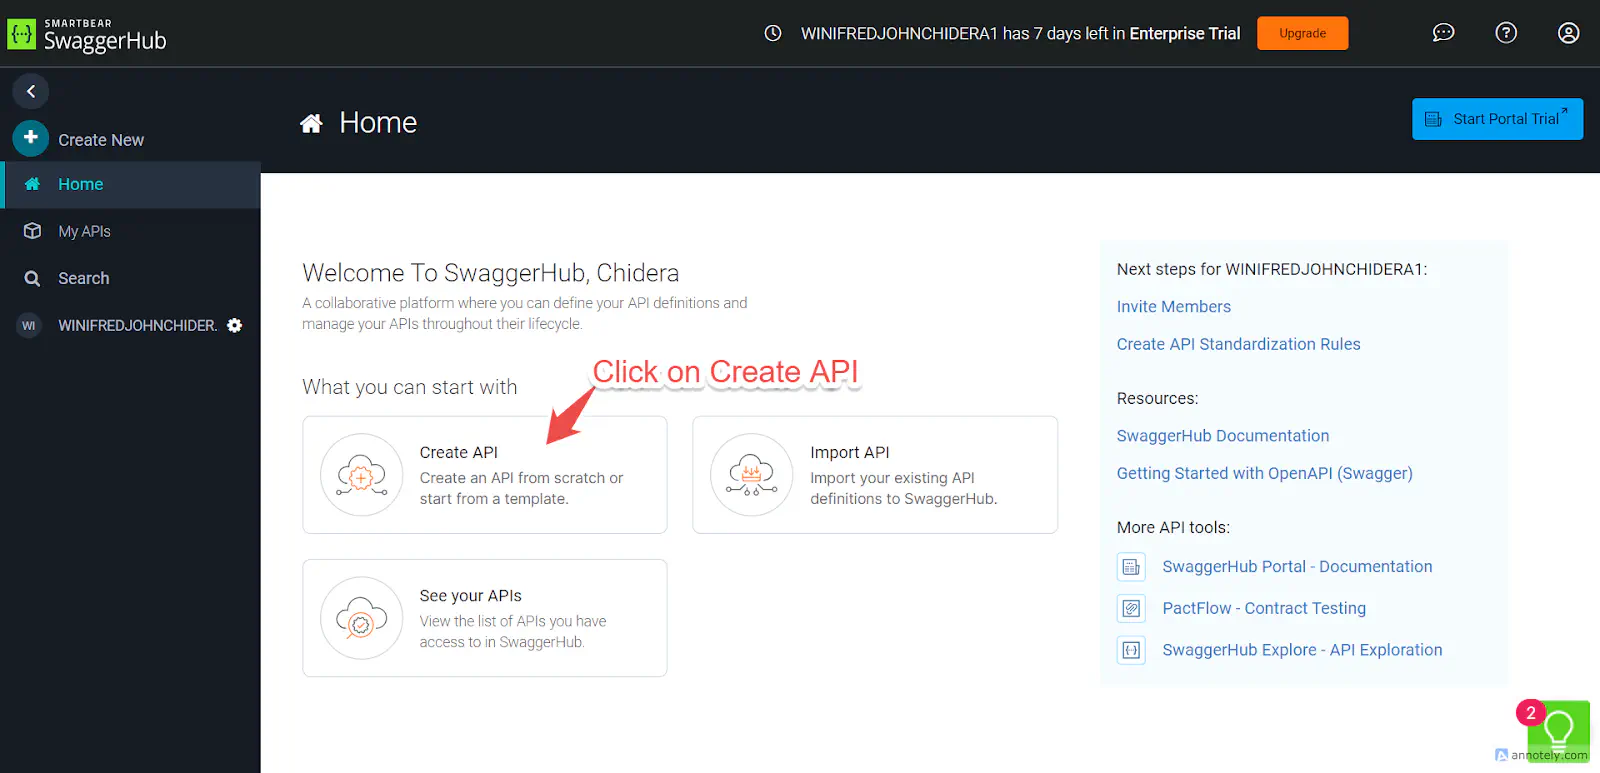
For this tutorial, we will be working with a sample Petstore API. However, if you already have an API to document, Click on Import API Note: Swagger only permits API in OpenAPI JSON or YAML format
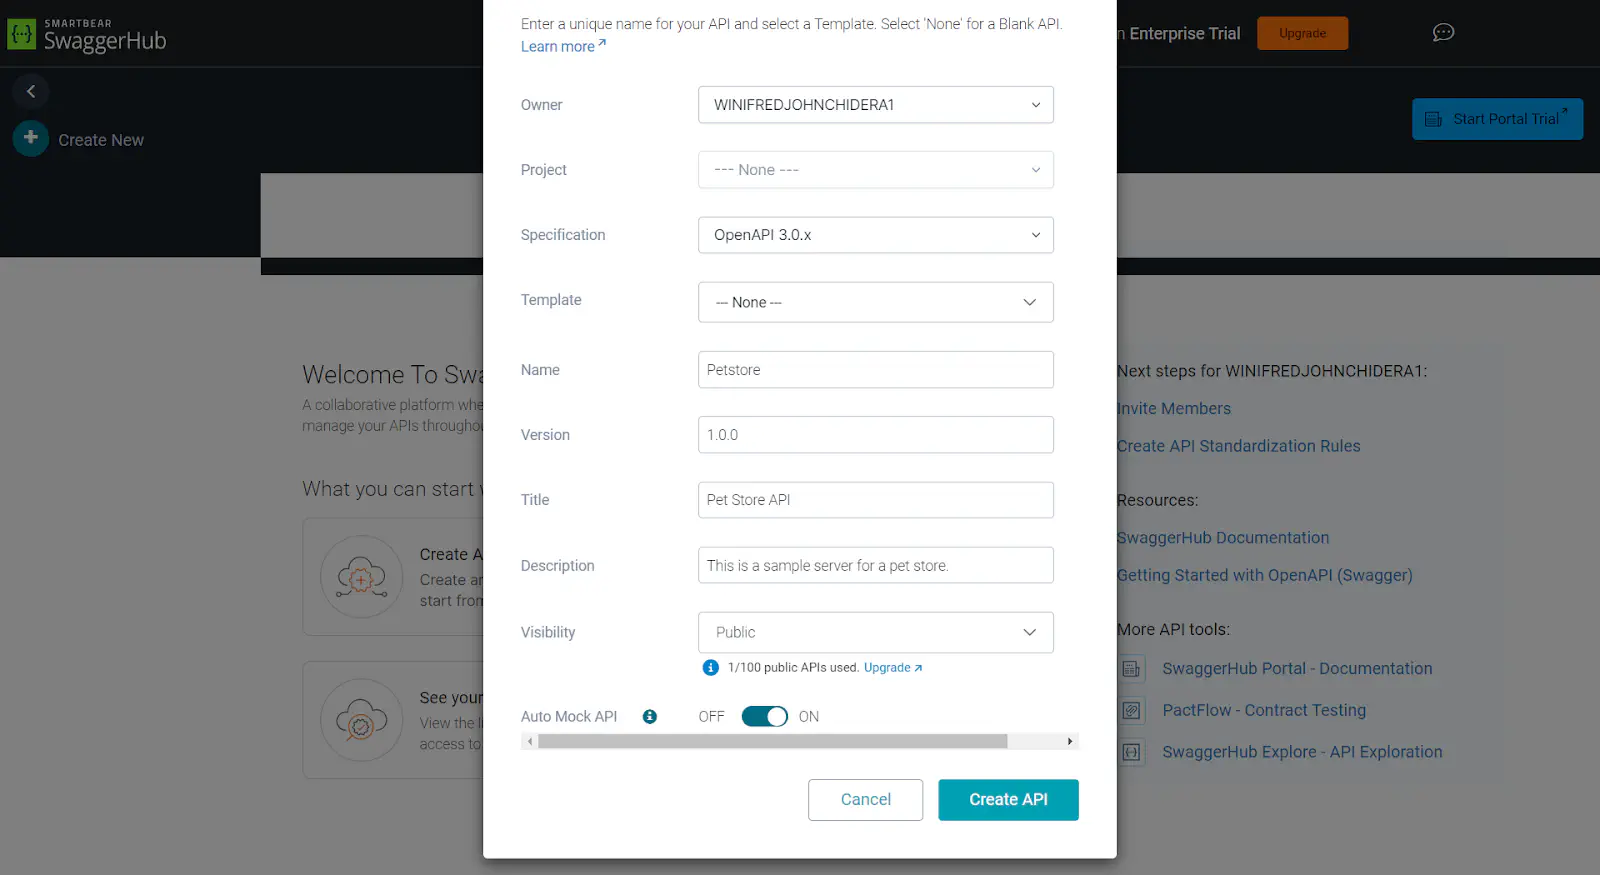
c. Fill in the Basic information of the sample Petstore API into their respective field.
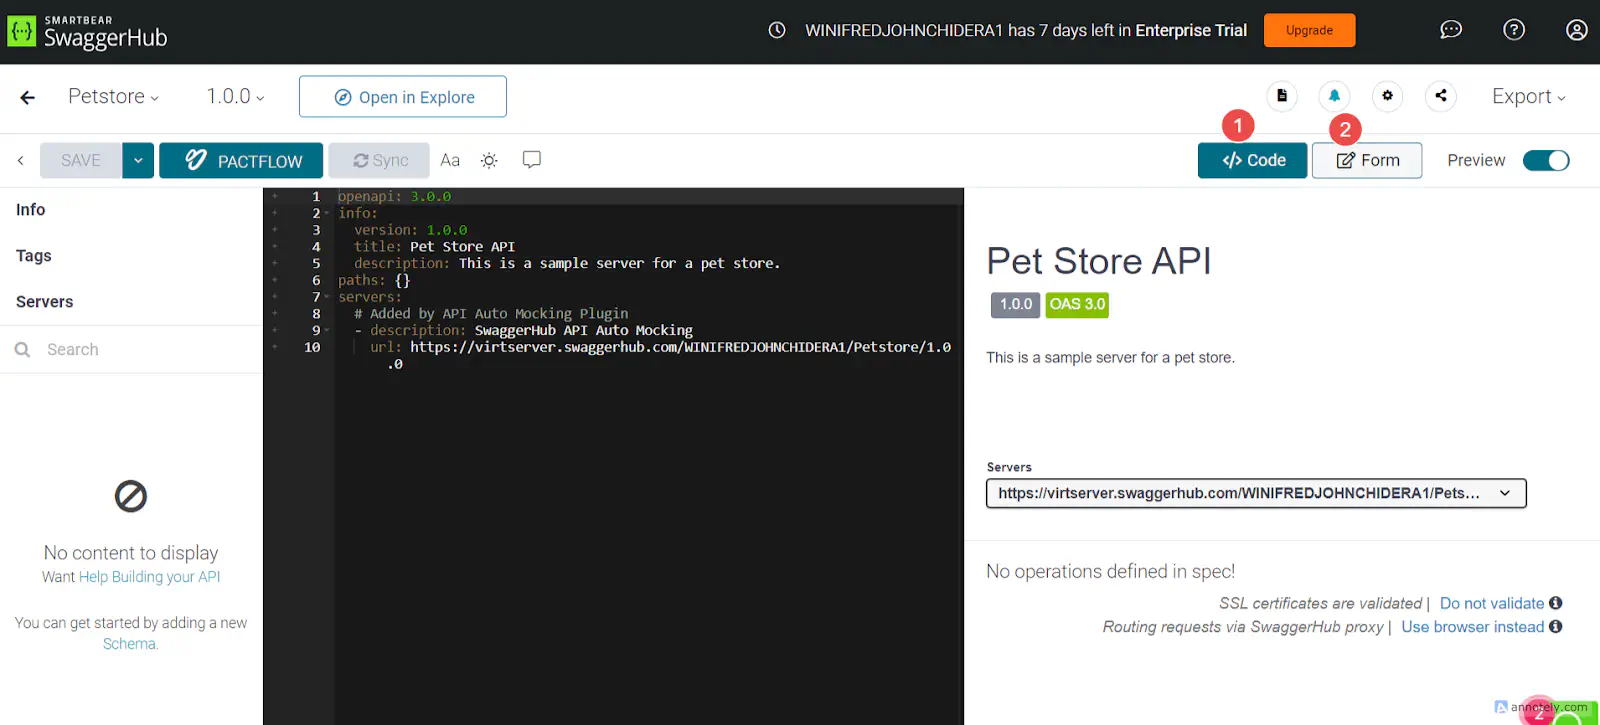
d. After you have created the API, you will see a preview.
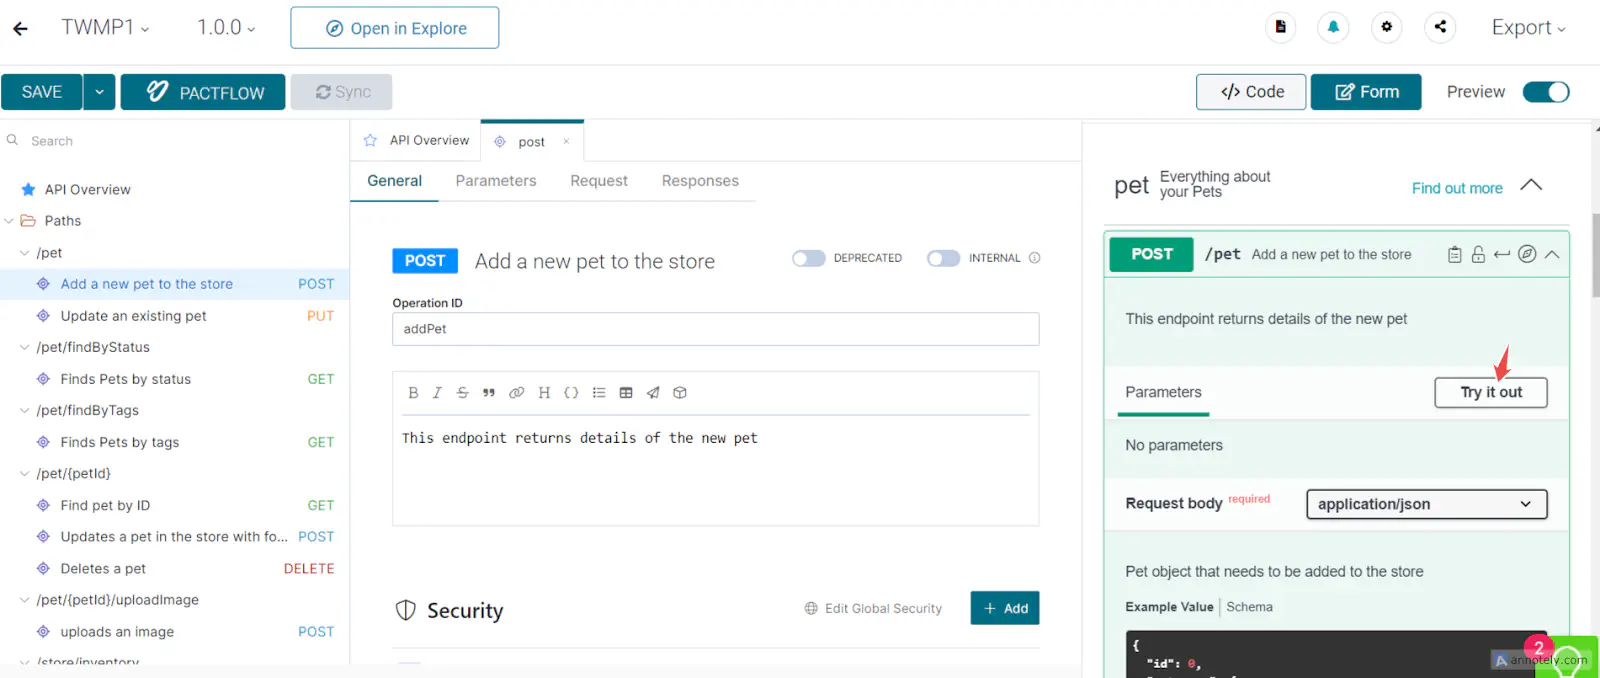
There are two ways to edit and create parameters in Swagger UI
The first is using **Code**: you can use an Open API YAML format to add new parameters and document the API before testing. If the idea of writing these codes is scary and new, there is an alternative method.
The alternative to ******Code** is **Form**. With **Form**, you can directly fill in the parameters and documentation as text fields.
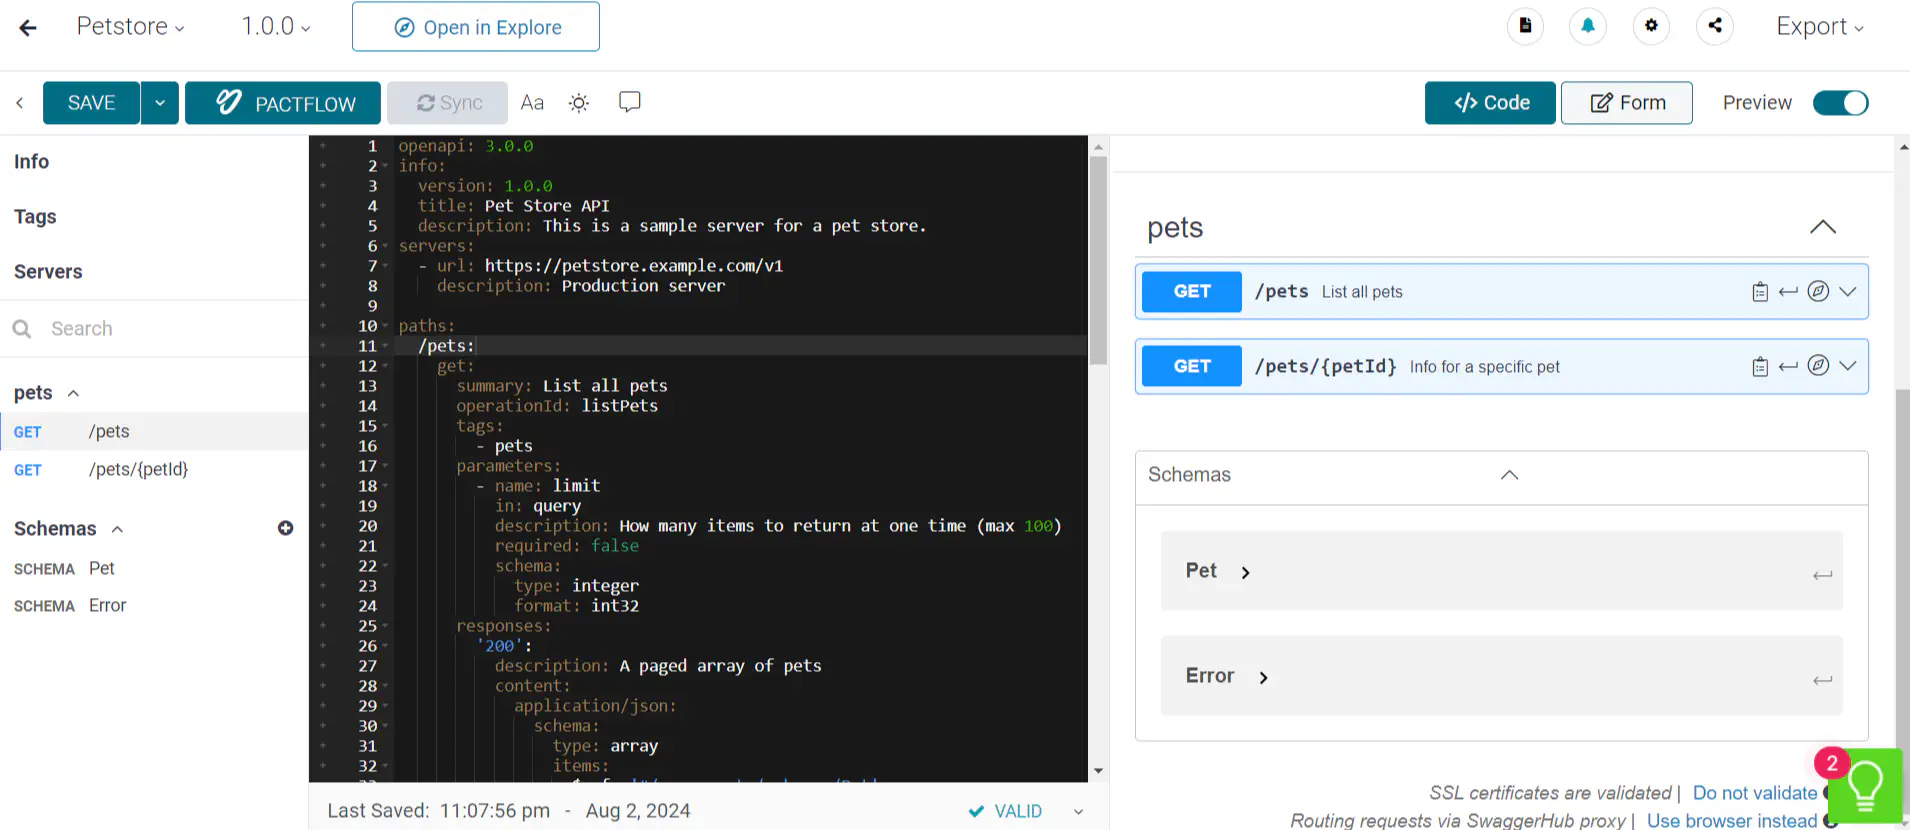
Let’s add documentation to our sample Petstore API.
1    servers:
2      - url: https://petstore.example.com/v1
3 description: Production server 1 paths:
2 /pets:
3 get:
4 summary: List all pets
5 operationId: listPets
6 tags:
7 - pets
8 parameters:
9 - name: limit
10 in: query
11 description: How many items to return at one time (max 100)
12 required: false
13 schema:
14 type: integer
15 format: int32
16 responses:
17 '200':
18 description: A paged array of pets
19 content:
20 application/json:
21 schema:
22 type: array
23 items:
24 $ref: '#/components/schemas/Pet'
25 'default':
26 description: unexpected error
27 content:
28 application/json:
29 schema:
30 $ref: '#/components/schemas/Error'
31 /pets/{petId}:
32 get:
33 summary: Info for a specific pet
34 operationId: showPetById
35 tags:
36 - pets
37 parameters:
38 - name: petId
39 in: path
40 required: true
41 description: The id of the pet to retrieve
42 schema:
43 type: integer
44 format: int64
45 responses:
46 '200':
47 description: Expected response to a valid request
48 content:
49 application/json:
50 schema:
51 $ref: '#/components/schemas/Pet'
52 'default':
53 description: unexpected error
54 content:
55 application/json:
56 schema:
57 $ref: '#/components/schemas/Error'
58 1 components:
2 schemas:
3 Pet:
4 type: object
5 required:
6 - id
7 - name
8 properties:
9 id:
10 type: integer
11 format: int64
12 name:
13 type: string
14 tag:
15 type: string
16 Error:
17 type: object
18 required:
19 - code
20 - message
21 properties:
22 code:
23 type: integer
24 format: int32
25 message:
26 type: stringNote: You can play around with the descriptions, responses and requests. Test them and see how they work.
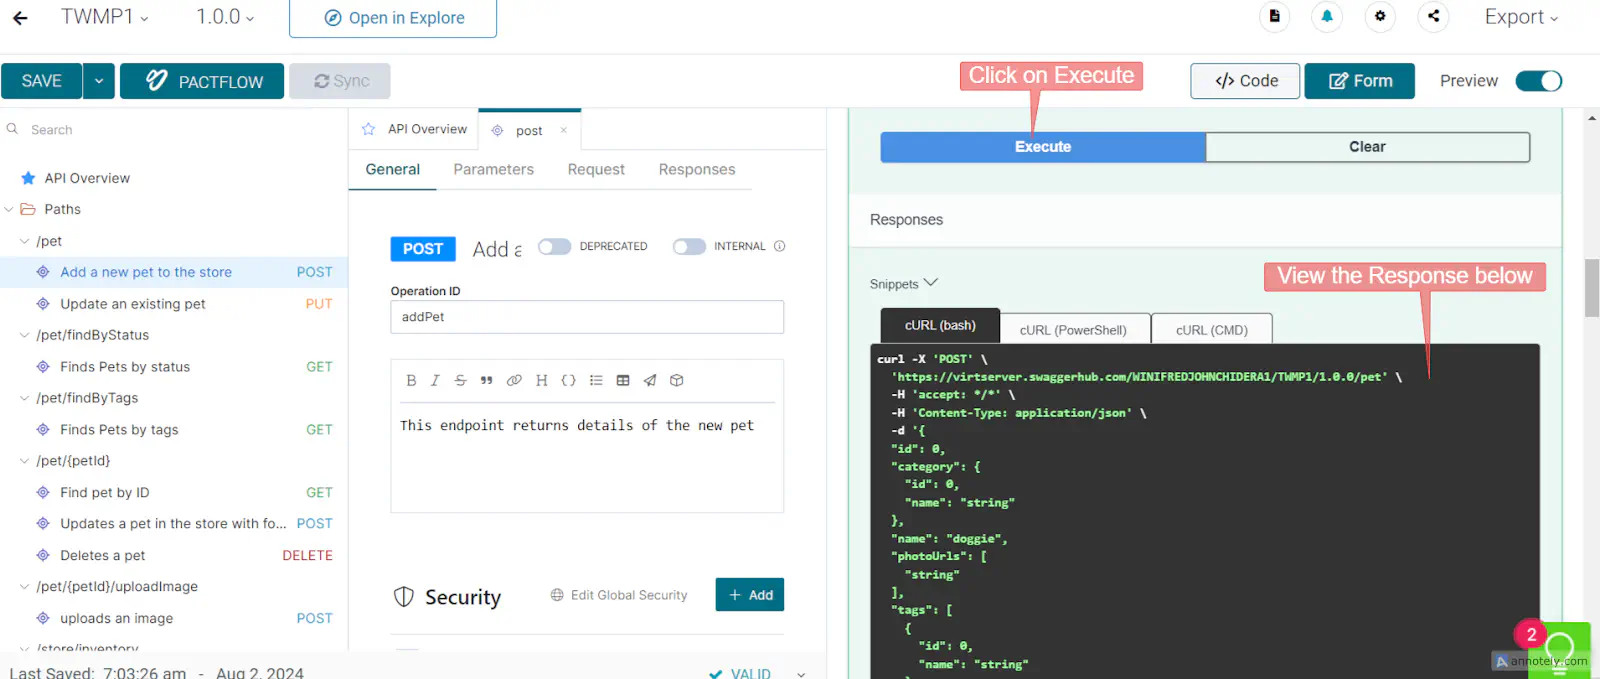
After adding new parameters, and changing the response body to suit your use case, you can now test the API and get real-time response.
To do this:
Click on Try it out under each request and see the real-time response below.
Click on Execute to see the real-time response
Non-interactive tools are more focused on providing detailed API information and instruction. They do not directly support API testing on their platforms.
Examples of non-interactive tools
Features of non-interactive tools
In this hands-on section, we will use the Petstore API as our example and demonstrate how to document it using Docusaurus, a powerful static site generator.
In this section, we will walk through how to use Docusaurus to create a static site for our API documentation.
a. Make sure you have Node js installed (>18.0.) Download Nodejs here
b. Create a new Docusaurus project and navigate to the project directory
1    npx create-docusaurus@latest my-website classic
2    cd my-website
c. Install dependencies
1 npm installd. Start the development server
1npm startOpen http://localhost:3000 in your browser to see the default Docusaurus site.
Tip: For the next steps, Use a code editor of your choice for easy visualization and Debugging. For this sample tutorial, I used Visual Studio Code
a. Once you have successfully downloaded Docusaurus, you can open it using Visual studio code
1cd my-website
2code .
b. In the docs folder, you will see intro.md, this is where we will be adding our API documentation.
Note: Docusarus supports Markdown and React pages.
---
sidebar_position: 1
---
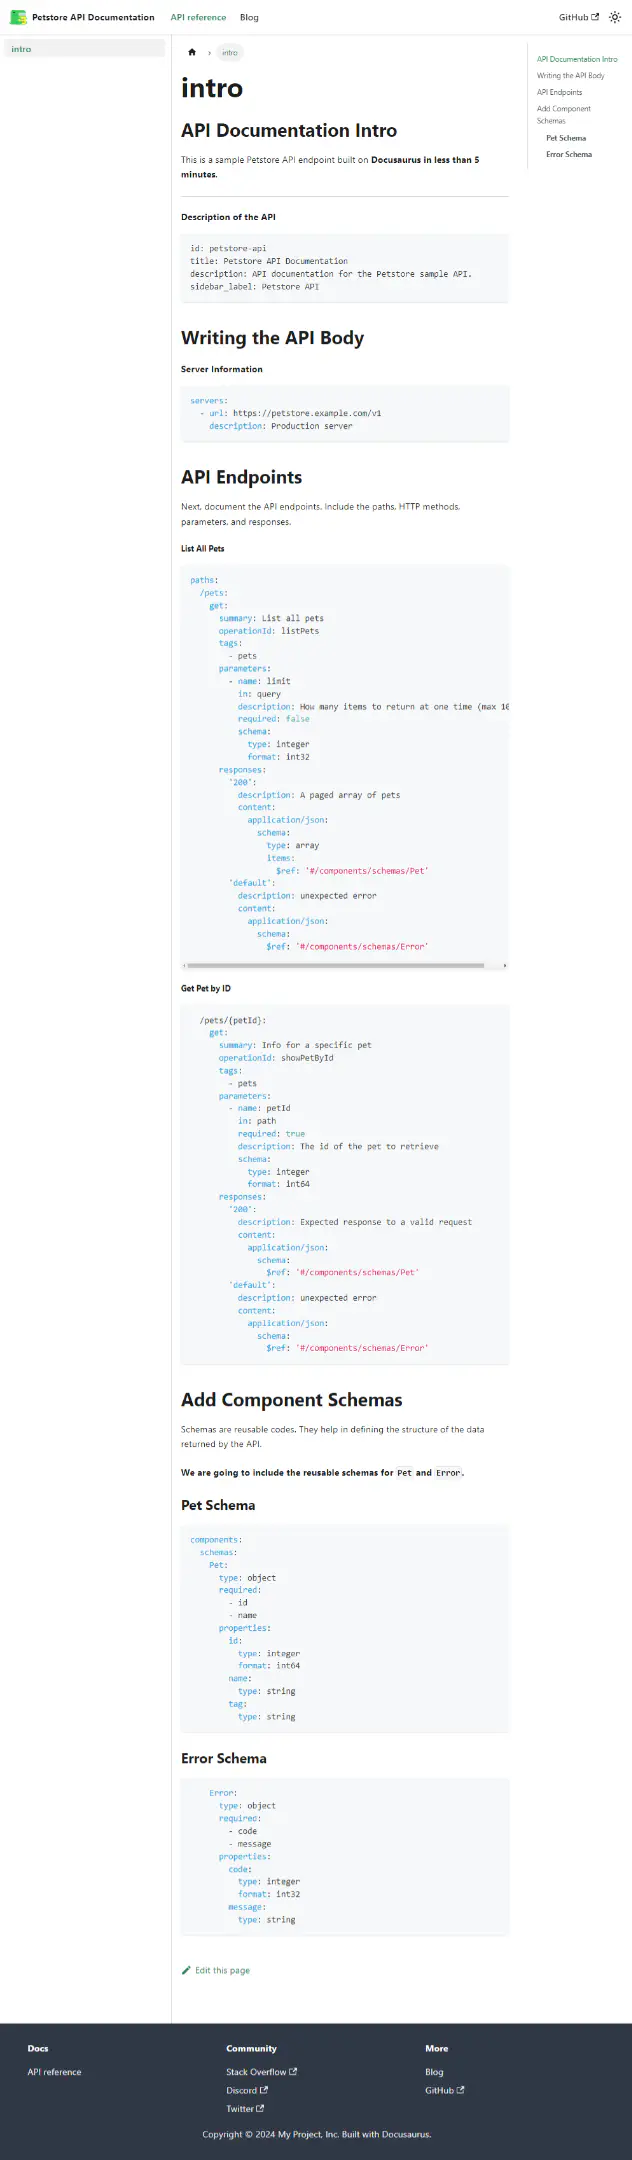
This is a sample Petstore API endpoint built on Docusaurus in less than 5 minutes.
 1    id: petstore-api
 2    title: Petstore API Documentation
 3    description: API documentation for the Petstore sample API.
 4    sidebar_label: Petstore API
 5    ```
 6    ## Writing the API Body
 7    #### Server Information
 8    ```yaml
 9    servers:
10      - url: https://petstore.example.com/v1
11 description: Production serverNext, document the API endpoints. Include the paths, HTTP methods, parameters, and responses.
 1    paths:
 2      /pets:
 3        get:
 4          summary: List all pets
 5          operationId: listPets
 6          tags:
 7            - pets
 8          parameters:
 9            - name: limit
10              in: query
11              description: How many items to return at one time (max 100)
12              required: false
13              schema:
14                type: integer
15                format: int32
16          responses:
17            '200':
18              description: A paged array of pets
19              content:
20                application/json:
21                  schema:
22                    type: array
23                    items:
24                      $ref: '#/components/schemas/Pet'
25            'default':
26              description: unexpected error
27              content:
28                application/json:
29                  schema:
30                    $ref: '#/components/schemas/Error'
31    ```
32
33##### **Get Pet by ID**
34```yaml
35      /pets/{petId}:
36        get:
37          summary: Info for a specific pet
38          operationId: showPetById
39          tags:
40            - pets
41          parameters:
42            - name: petId
43              in: path
44              required: true
45              description: The id of the pet to retrieve
46              schema:
47                type: integer
48                format: int64
49          responses:
50            '200':
51              description: Expected response to a valid request
52              content:
53                application/json:
54                  schema:
55                    $ref: '#/components/schemas/Pet'
56            'default':
57              description: unexpected error
58              content:
59                application/json:
60                  schema:
61 $ref: '#/components/schemas/Error'Schemas are reusable codes. They help in defining the structure of the data returned by the API.
Pet and Error. 1 components:
2 schemas:
3 Pet:
4 type: object
5 required:
6 - id
7 - name
8 properties:
9 id:
10 type: integer
11 format: int64
12 name:
13 type: string
14 tag:
15 type: string 1 Error:
2 type: object
3 required:
4 - code
5 - message
6 properties:
7 code:
8 type: integer
9 format: int32
10 message:
11 type: stringLive View of the site: Petstore Sample API This is how your API documentation site should look like:
There are several or tons of API documentation tools. We’ll not be deciding which tool is better; they all have unique features and capabilities. Rather, we’ll decide what tools to use after considering certain factors that are key to the API documentation we are working on.
Let’s discuss those factors:
Usability: Is the tool easy to use and understand? Your choice of API documentation tool, especially as a beginner, should have an intuitive interface, easy navigation, and good support/documentation.
Functionality: If you require additional functionalities like a search functionality to be part of your API docs, then your choice of API documentation tool must support that.
Customization Options: Your choice of API documentation tool also depends on the ability to add custom branding and styling.
Integration Capabilities: Does the tool integrate with existing development tools or support continuous integration and development (CI/CD) pipelines? If these features are necessary for your project, then you should consider tools that support them.
Documentation Format Support: When choosing a documentation tool, it is important to know its compatibility with different file formats (Markdown, HTML, JSON).
Note: It is advisable to choose a tool with the flexibility to export documentation in different formats.
Other factors to consider depending on your usage include the cost/pricing model, scalability, support for version control, and access control features.
We did all the work for you: Here are popular API documentation tools and their unique features. Key:
| S/N | Tools | Ease of use | Search Functionality | Customization | Integration | Format Support |
|---|---|---|---|---|---|---|
| 1. | Swagger (Open API) | High | High | Moderate | High | JSON, YAML |
| 2. | Postman | High | High | High | High | Markdown & JSON |
| 3. | Redoc | High | High | Moderate | Moderate | OpenAPI (JSON, YAML) |
| 4. | Readme | High | High | High | High | Markdown & JSON |
| 5. | Docasarus | Moderate | High | High | High | Markdown & JSON |
| 6. | MkDocs | High | High | High | High | Markdown |
| 7. | Apiary | High | High | High | High | API Blueprint, Swagger |
| 8. | APIdog | High | High | Moderate | High | Markdown & JSON |
| 9. | Slate | Moderate | Moderate | High | Moderate | Markdown |